Intention blocks
Do you ever set intentions?
Some people think that intentions sort of well-wishing malarky. A product of a modern-yogi mentality that has us inspired by the verbiage on a Lulu Lemon bag. You know the ones I mean – quick snippets that make you feel good about carrying your new bag through the mall.
Matt and I are always setting intentions. For our workouts, floats, mediations, runs, work, you name it. Before we begin just about anything we like to have an intention that we are mindful of throughout our activity.
My favourite are workout intentions. Sometimes they are as basic as asking for “clarity”. That might mean being clear on a problem I may have, or maybe just mind clarity while I run.
Since we love intentions so much, today I’m going to show you how to create your own intension blocks for your home. They are simple little decorative plaques that are half art, half inspiration piece that will hopefully bring some light and calm your favourite space.
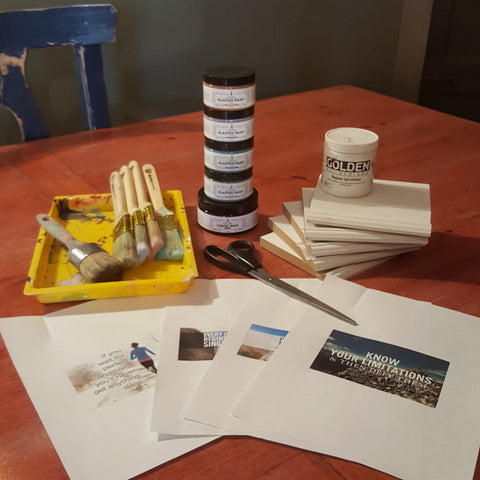
For our activity you are going to need the following materials:
- Wood Blocks – $3-$4/ square foot. We will be using chunks of primed wood from the Baseboard & Moulding section of your local hardware store. Get four pieces, each approx. 7 inches high and 6 inches wide. These types of pieces are usually pre cut and ready to go but if the style of board you want has to be cut just ask a store associate to cut it for you…make sure you say PLEASE!

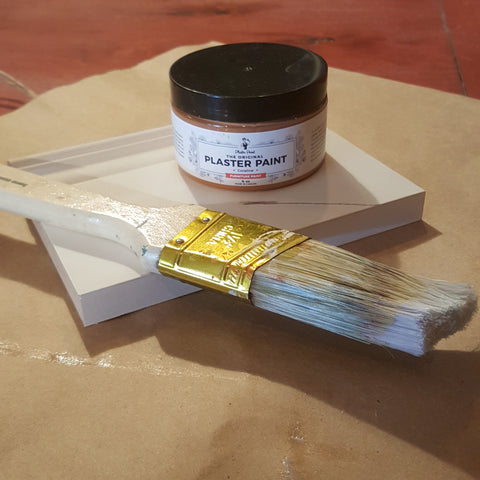
- 2. Paint – $8/4oz jar. You will want four jars – a different colour for each board. My favourite paint is Plaster Paint because of it’s chalky vintage appearance, great colours and easy application (no priming or sanding required with this paint!).

- 3. Paint Brush – $4-$6. Any synthetic brush will do. Look for one around 3 inches wide. Any hardware store will have this size and style.
- 4. Paint Foam Brush – $2. This is a foam brush for applying Mod Podge. Any hardware store will have one of these brushes in their paint section.
- 5. Mod Podge or Gilding Gel- $10-$15. Mod Podge is a glue and sealer in one. It comes in a few different finishes, so this is where your own creativity comes into play. You can choose between matte, sparkle or gloss-lustre. If you want a dull, no-shine look then go for the matte. If you want something with some shine then go with the gloss-lustre. If you really want something extreme, choose the sparkle.
- 6. Images – FREE
- 7. Scissors- For cutting out your images
- 8. Sealant- To seal our paint and images so they can’t be removed or rubbed off we are using Plaster Paints Semi-Gloss Wax.

You’ll need four images for your blocks.

Think of what your intension needs to look like. Are you struggling with staying calm and focused at work or on a project? Then how about trying one of these:
- I will think of a solution.
- I will not let worry control me.
- I will not let stress levels break me.
- I will breath.
- I don’t quit.
You can search Google or Pinterest for images with these types of words or look in your favourite “motivational” magazine and tear out images you’re drawn to. There may even be some personal images that you find useful here.
Alright, now that you have all your supplies, it’s time to kick some inspirational butt! Below are our simple instructions to put this project into motion.
Simple instructions:
1.Take your wood blocks and figure out how you’d like to display your images on each block. Don’t be afraid to rotate the block as your images can run horizontal or vertical. Spice it up a bit, they don’t all have to be uniform. Once you have an idea of how your images will be displayed on each block, lay your pictures to the side.

2. Choose your paint. Coat each board with it’s colour of paint, keeping the first coat thin and allowing 20 minutes dry time before you add second coat. Now you have the choice to either distress your board, glaze your board or leave it as is. Leaving the piece as is means your ready for the next step.


3. If you choose to distress, then take light sanding paper (120 grade) and sand off anywhere you would like to mimic natural wear. If you choose to glaze then you will have to use Plaster Paint’s Glaze Sealant. Im using a black glaze, just paint on an even coat and immediately wipe off. The glaze will adhere to all the cracks and crevices, highlighting the piece.


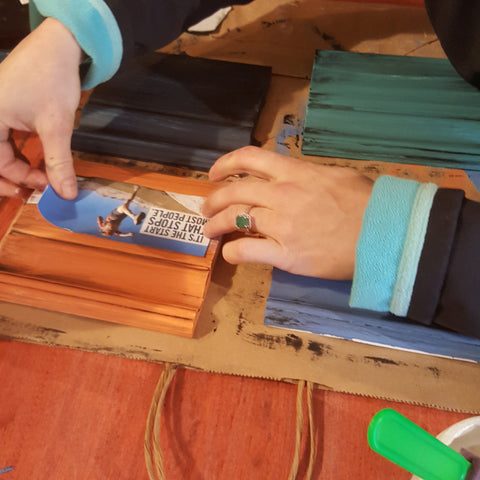
3. Now that your blocks are dry, grab your images and lay them on top of each block. Trim each image to fit its block.


4. Take your Mod Podge/gel medium and foam brush and cover your block where the image will adhere in a nice even coat.


Lay your image (facing up) over top of the Mod Podge area.

Now smooth out the image with a smooth surface, I used a small piece of wood, you could use a ruler. Allow this to dry 25-30 mins.


Now it’s time to add your sealant or top coat.


That’s it! You now have four motivational art pieces you can display anywhere in your home. These pieces will inspire you, uplift you and remind you that you can do anything…even crafting projects, haha!

Always be creating.
Layne & Matt

Leave a reply